welcome


Brad and I are flipping our first investment property house with a rustic, modern style. All of our posts can be found on the left side of the page, organized by date and title or you can stay on this page and scroll down to see the most recent things we have done.

To consistently follow along on our remodeling journey, subscribe with emails by submitting your email address in the bar on the left side of the screen.


Wednesday, January 28, 2015

Installing kitchen cabinets

By installing the cabinets ourself, we saved $2,700 that Home Depot would have charged! Considering we have a relatively small kitchen, we definitely wanted to do it ourself! 

Brad and his dad extensively researched cabinet installation and found a custom automatic leveling system at EZ-level.com. 

They watched many videos on YouTube too on how to use this system. This is a small synopsis, but I definitely recommend watching the video a few times through at 


First, we began the process by finding the highest point in the slab so all the cabinets could be raised to that point. The foundation is never level, which is why the base of the cabinets must be raised, in order to be level.

**Once we found that measurement, we added 20 inches so the bottom of the wall cabinets would be level at that point.

We screwed a 2x4 into the stud, called the ledger board, where the bottom of the wall cabinets would be installed so that we could set them on there when drilling them into the studs. 

Using a bosh laser level made the leveling much easier because it basically levels itself and you can arrange the cabinets according to the laser lines! 


The boys started on the top cabinets and worked in s systematic order, around the room, from left to right. 

After the top cabinets were all installed and attached to the studs, we determined the height of the base cabinets and installed EZ levelers on the bottom of each cabinet! 

Then, we brought them all up to lazer level height at the same time, installing left to right. 


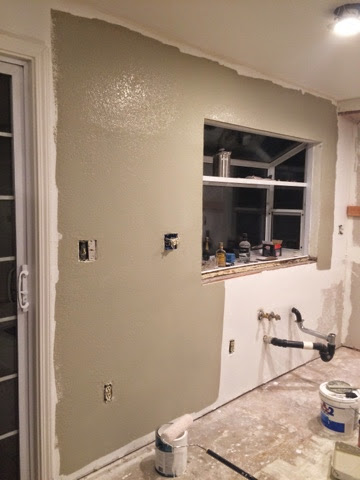
 Using the bosh lazer level made this process possible, and easy! As you can see, as the boys worked on the cabinets, I finished up painting! That way, once all of the cabinets were screwed into the studs, we were ready for "Mike the granite guy" to come the next morning and put in the Quartz countertops! 

^^ (at the end of cabinet installation)

Since we are going for a modern rustic AND minimalist style, we wanted a countertop that accented our cabinets and wasn't too busy. Also, since the floors are going to be a rustic pecan color, we wanted the countertops to really compliment the warmer tones in the floors! 

After shopping around and getting many referrals, we went to Granite Outlet in Rancho Cordova to pick the color and style of our countertops, at a minimal price! 


There were MANY options for granite, but I really didn't like the busy patterns on them. Since we want a minimalist feeling, the complex, large patterns wouldn't work. 

This sand/tan color was an option...


But it's granite. Granite isn't really "in" anymore, and this looks so busy. Not my thing. 

Then Brad spotted this baby. 


Done. Done and done. 
We found the one. 

So, the next day while I was at work, Brad's mom and dad PAID for our new countertops and for them installed for us. 

I know. I feel so spoiled, it's not even funny. 

Thank you sooooooooooooooo much Tom & Jeri!!!!!!!!!!!!!!


After the counters were in, we (mostly Brad) struggled with the plumbing for the sink for a few days, but eventually that was hooked up along with the stove and dishwasher!!

Now we have a fully functional kitchen again! The next steps will be to finish the floors, backsplash, and crow molding! 


We will probably take a couple week vacation from the remodeling though...

More updates soon!!! 

Starting to rebuild

I've been a baaaad blogger this last week, I know. In my defense, it was the first week of school at Folsom AND Sac State so I've been running around like a crazy person trying to add classes. In the meantime, the kitchen has been quite the project. 

When we demolished the original kitchen cabinets and backsplash, we ended up taking out large chunks of drywall from the walls...

 
Rather than just patching up the holes, we decided to re-drywall everything to match the ceiling, and to replace the old insulation. By doing so, it would make it easier for us to match the new texture to the rest of the house (and maybe save some money on our energy bills), without everything looking patchy. 

And so, we were left with this...


The first step was to nail on the new drywall onto the studs and then mud over the gaps between each panel.

 **We completed this process just like we did on the roommates bathroom upstairs and the ceiling 

This process took longer than expected though because, on top of our really hectic schedules, we could only do little bits each day since we had to let every coat dry. 


We also ran into little hiccups along the way, like the vent....


Yes, that vent on the ceiling. 

We forgot to take into account that the new cabinets around the fridge were going to stick out further than the old ones, and for that reason the vent would be covered! We had to move it. 

This process set us back a bit, but it all was taken care of :) 


Once all of the mudding was finally finished, we textured! This only took one day, and then we painted right over the top. 

I used a large mixing bucket to dilute the drywall mud to the consistency somewhere between soft serve ice cream and creamy peanut butter. 


We then emptied this into the spitter machine! While Brad sprayed, I would make more. This definitely saved a lot of time! 


Using long, continuous motions, we spit all of the walls and ceiling. We turned off all the lights and used a flashlight at a diagonal to double check the coverage. You want everything to be an equal amount of coverage and thickness. As Brad's dad said, "an organized chaos."


And then we waited for it to dry for about 10-15 minutes. At this point, the texture should look a little bit wet, and when you trile over it with the puddy spatula thing, it should flatten evenly. If it's too wet, the mounds you just splattered on will flatten completely and if it's not wet enough, they won't flatten at all or you will scrape them off. I would suggest testing it on little areas of the wall where it won't show much, just to be sure it's ready. 

This is the part I love doing because it's fast, fun, and you get instant results! 

These are the tools you need... 


You have to hold the large puddy tool almost flat against the wall or ceiling you are working on, then apply enough pressure to flatten the mounds enough, but not too much that they flatten completely. If you scrape off the mounds because the tool is perpendicular to the wall, you have to respit, and that's never fun.


After this step was finished, we let it dry for about an hour and then painted! 

We sealed off the area where the sink would be with a paint calls Killz. This paint kills mold and prevents new mold from forming. Also, we used a satin paint enamel in the same color as our other walls, because it was going into the kitchen. The satin finish is good for areas with high traffic or moisture, like kitchens!  


And that concluded our Friday night! The next morning, the boys were up extra early to put in the cabinets!!! 


Sunday, January 18, 2015

D-day turned into D-week...

Demolition. You'd think it would be easy to just break everything out of the kitchen with a sledgehammer and voilá.. but no. 

I mean, don't get me wrong, the demo part was pretty easy just slamming things out (especially for me because I was "actively participating" by watching with a glass of wine in hand at all times), but then we had to get all the parts OUT. I'm not sure why I didn't think about that part, but it was definitely hard work! In total, I think we took 2 full truck loads of debris to the dump. Cray.


So, we began the demo by taking off cabinet doors and the tiles off of the countertops. Basically, everyone took out some aggression slamming everything with a hammer! Brad's mom definitely had a great time!!


After the tiles were off the counters, we could rip the rest of the cabinets off too!! The cabinets were more difficult to remove than they should have been only because they were NAILED into the walls, not screwed in. For this reason, the boys were using crowbars and hammers to pull them down, rather than just an electric screw driver. They came off though!


Then we removed the ugly tile backsplash!! 


I know it looks bad, BUT I am assured that it will only get better from here. The reason we have holes in the walls is because the tile was applied to the wall with that cement and when we pulled off the tile, the drywall came with it! For that reason, we decided to rip down and re-drywall everything so we will have completely new walls and we won't have to match the old texture. This should make it a little easier, actually! So to clear out all of the debris, we used small boxes (that way they weren't too heavy to carry to the truck) to fill the truck up. And as I said before, we dumped 2 FULL truck loads, which was about $20 for each, but was important for my sanity. All I want to do is dust... And sweep... And vacuum...

As the floor demo though, we rented a 37 pound demolition hammer from Home Depot because there was quickset under the tiles, cementing them down. The machine made the job A LOT easier for the boys and since Adam does floors for a living, he was our guy. 


The most important thing to remember while using the machine is to wear eye, ear, and lung protection. The air became extremely dusty and it was actually painful to breathe in the house. Brad and Adam both wore respirators, gloves, ear plugs, and goggles while doing this and opened all the windows and doors.

If we had to do it again I would definitely go buy some fans to blow more of the air out of the house. Also, we moved most of the furniture into our bedroom to avoid dust, but if I had to do it again, I would just cover everything in plastic to make living easier..


Adam and Brad got the whole floor demolished in about 4 hours! 

Again, the boxes came in really handy for filling and carrying out debris to the truck!
We borrowed a flat head shovel from the neighbor to scoop up the broken bits of tile, and this came in really handy! 


And so ends our demo-weekend (yes, "D-day" quickly turned into "D-weekend") with an extremely dusty house and an empty room we call our kitchen... 


Saturday, January 17, 2015

Creating a rustic look

Since my sister was moving to Denmark, she left me some of her old furniture. One of the things she left was a TV stand/console table type piece that had a lot of damage like scratches and dings. I really love the style and size, but because it's made of that fake wood stuff, it's not possible to sand it down and re-stain. 

Sooooooo I decided to make it rustic! 

I had some left over gray paint samples from Home Depot from when we were choosing the wall color, so I grabbed that, a paint brush, some paper towels, and a sponge and got to work!! 


I applied the paint to only the tip of the brush and brushed it on with long, fluid motions. I wanted it to stay really "chipped" and old looking to keep that rustic feeling. 

Since its a water based paint, I could use the damp sponge to swipe over areas I painted to soften up the color. Then, with the paper towels I rubbed in the paint until it had the texture I was going for. 


And here's the finished product!!


Thursday, January 15, 2015

Small things that make a huge difference

Since The Bunker was built in the late 70's, it still has a ton of those gross, outdated gold features. Our goal for updating the house is to replace all of these with new, modern ones. 

Today, since it was my day off, I tackled a few little jobs that made a huge difference. 


These are the numbers on the front of The Bunker. Since they are gold, they INSTANTLY aged the house and I hated them. So, in order match the rest of our black, modern accents, I grabbed my ladder, electric screw driver, and a can of black spray paint to save the day! 

I'm not the best at spray painting, but it's pretty self explanatory. I washed the numbers first to clean of debris. Then, after they air dried, I applied a thin layer of spray paint using long continuous movements. I also painted the screw heads to match:) 


I gave them more than enough time to dry (like 3 hours) before I put them back up because I was kinda afraid of scratching off some of the paint when I screwed the screws back in. I think that was a good idea because they are perfect!! 


And there yah go!!! 


Now we really need to switch out those front lights with something new....another day:)

In other news, I wanted to add curtain holders (I'm not sure of the technical term for them) to hold the curtains on each side of the window. 

Adding holders to pull the curtains to the side just really opens up the window and makes the whole room feel a lot bigger. When the drapes are straight and hanging, they aren't as "home-y" feeling.

See for yourself :) 


I think it makes the window look HUGE!

As you can see, I used black hardware to match the top curtain rod, which is also black. You can also see in the photos that when we hung the curtain rod, we decided to do it a bit differently by connecting it to the ceiling. By doing this it made the walls appear taller and the window bigger! 


What do you think? 

Please leave comments below!!! :)